Blinky on Alchitry CU
Let's go from an empty setup to a functioning blinking LED on an actual FPGA! Blinking an LED is a time-honored tradition of demonstrating that you can go from source to somehting that understands the hardware it is running on.
Mise en Place (Prerequisites)
Hardware projects can be a little more complicated than pure software ones. So let's look at the prerequisites for this tutorial.
The FPGA board
In principle, all you need is an FPGA board with an LED that you know how to program. There are a number
of hardware specific bits and pieces that you need to get right for RustHDL to actually work on you device
of interest. In particular, knowing what FPGA is being used is not sufficient in and of itself. You
need to know how it was configured and connected to make it do things. In any case, for this tutorial,
let's start with the Alchitry Cu board. It's reasonably inexpensive, very well constructed and designed, and generally available. But adapting this tutorial to other boards is quite straightforward. Here is a pic of the Alchitry board 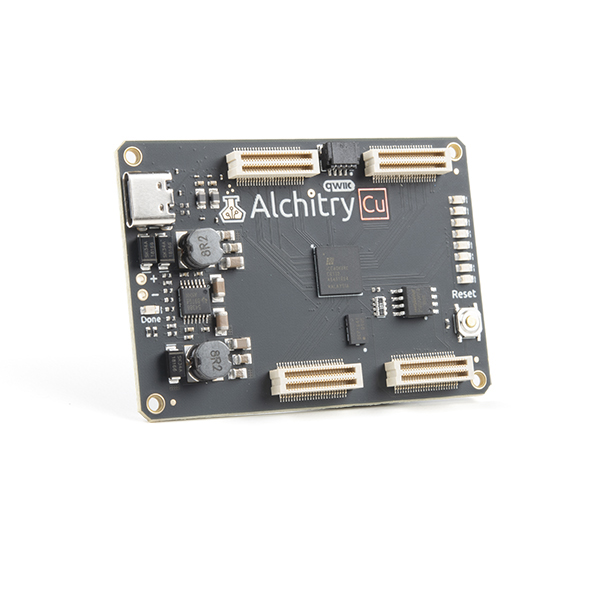 .
.
The host OS
With the exception of Yosys, I do not know of FPGA tooling that runs on Mac OS X. So I would recommending using either Linux or Windows for now. This tutorial will assume Linux (and comfort with the command line). The exact Linux distribution doesn't matter per se, but the host OS will need to provide tools that Rust does not. And those will require the host OS package manager to be involved. For now, I've picked an Ubuntu distribution.
Rust basics
I would say that RustHDL requires basic understanding of how to code in Rust. If you are comfortable with
- Strong types
- Algrbraic types (enums)
- Matching
- Basic expressions
- Value types
You should be good to go 👍. You do not need to worry about lifetimes, references, or any of the more intermediate concepts. I strongly recommend this not be your first experience with Rust. That should come from the book. Once you have gotten an handle on that, this should all seem quite simple.
I will assume, for example, you have already installed cargo, rustup, rust, etc.
Code Editor
This is important! Let's face it. Generally, IDEs for HDLs are pretty rough. There aren't enough HDL users to really stimulate the ecosystem and get focus on good tooling. This is not the case for RustHDL! RustHDL uses Rust's syntax, and the analysis tools are capable of understanding most (if not all) of what RustHDL does under the hood. As a result, you get great features like
- code completion
- syntax highlighting
- warning and errors
- go to definition/declarations etc
even inside your HDL code! You can even use vim or emacs with these tools if you want to. To me,
the ability to piggy-back 🐖 on the broader community for things like IDE support are one of the big
pluses of working in RustHDL instead of something more domain specific. If you need help getting
set up, this page from the vscode team is a great place to start.
FPGA Toolchain
Beware the slings and arrows of outrageous FPGA toolchains! There are many hurdles here, and progress is slow. Suffice to say things are getting better, but you may still need to deal with a legacy toolchain. The Alchitry CU uses the iCE40HX FPGA from Lattice, and it is well documented by Project IceStorm. Installation with modern distros is simple. For Ubuntu, it's
sudo apt install fpga-icestorm
Note that you need a place and route tool. The one originally used (arachne) is no longer supported. So I went ahead and also installed the nextpnr-ice40 package.
sudo apt install nextpnr-ice40
Ready Set Go
With everything in place, we can get started, and it will come together quickly. First, we create a new Rust project of the binary type.
samitbasu@samitbasu-virtual-machine:~/Devel$ cargo new blinky
     Created binary (application) `blinky` package
Next, we add the rust-hdl meta package as a dependency. You will need the fpga feature
samitbasu@samitbasu-virtual-machine:~/Devel/blinky$ cargo add rust-hdl --features fpga
    Updating crates.io index
      Adding rust-hdl v0.45.0 to dependencies.
             Features:
             + fpga
samitbasu@samitbasu-virtual-machine:~/Devel/blinky$
We will also need the board support package for the Alchitry Cu board. So lets add that too
samitbasu@samitbasu-virtual-machine:~/Devel/blinky$ cargo add rust-hdl-bsp-alchitry-cu
    Updating crates.io index
      Adding rust-hdl-bsp-alchitry-cu v0.45.0 to dependencies.
samitbasu@samitbasu-virtual-machine:~/Devel/blinky$
Next, we need to replace the contents of main.rs with the following
use rust_hdl::prelude::*;
use rust_hdl_bsp_alchitry_cu::pins::CLOCK_SPEED_100MHZ;
use rust_hdl_bsp_alchitry_cu::{pins, synth};
use std::time::Duration;

#[derive(LogicBlock)]
pub struct Blinky {
  pulser: Pulser,
  clock: Signal<In, Clock>,
  leds: Signal<Out, Bits<8>>,
}

impl Logic for Blinky {
  #[hdl_gen]
  fn update(&mut self) {
    self.pulser.enable.next = true;
    self.pulser.clock.next = self.clock.val();
    self.leds.next = 0x00.into();
    if self.pulser.pulse.val() {
      self.leds.next = 0xAA.into();
    }
  }
}

impl Default for Blinky {
  fn default() -> Self {
    let pulser = Pulser::new(CLOCK_SPEED_100MHZ.into(), 1.0, Duration::from_millis(250));
    Blinky {
      pulser,
      clock: pins::clock(),
      leds: pins::leds(),
    }
  }
}

fn main() {
    let uut = Blinky::default();
    synth::generate_bitstream(uut, "firmware/blinky")
}
That's it! Now to build firmware, we return to the command line
samitbasu@samitbasu-virtual-machine:~/Devel/blinky$ cargo run
   Finished dev [unoptimized + debuginfo] target(s) in 15.74s
   Running `target/debug/blinky`
samitbasu@samitbasu-virtual-machine:~/Devel/blinky$
The output directory firmware/blinky contains our top.bit firmware file, that we can flash onto the Alchitry using the iceprog tool:
samitbasu@samitbasu-virtual-machine:~/Devel/blinky$ iceprog firmware/blinky/top.bin
init..
cdone: high
reset..
cdone: low
flash ID: 0xEF 0x40 0x16 0x00
file size: 135100
erase 64kB sector at 0x000000..
erase 64kB sector at 0x010000..
erase 64kB sector at 0x020000..
programming..
done.
reading..
VERIFY OK
cdone: high
Bye.
samitbasu@samitbasu-virtual-machine:~/Devel/blinky$
Watch for blinking!
Needs a few emoji: 🎉🎈🦀, but most importantly, 😁!
Just the Verilog, Ma'am
It's possible that you just want the Verilog associated with your RustHDL design. In that case, you simply:
- Instantiate the struct so it reflects what you want for the top level
- call
connect_allon it to connect up the internal wires - Pass it to
generate_verilogthat returns a string.
So for our blinky example, replace main with the following:
fn main() {
    let mut uut = Blinky::default();
    uut.connect_all();
    let vlog = generate_verilog(&uut);
    println!("{vlog}");
}
If we cargo run, we now get
[samitbasu@sparkle-squid blinky]$ cargo run
   Compiling blinky v0.1.0 (/home/samitbasu/Devel/junk/blinky)
    Finished dev [unoptimized + debuginfo] target(s) in 0.74s
     Running `target/debug/blinky`
The output for the current release of RustHDL is:
module top(clock,leds);

    // Module arguments
    input wire  clock;
    output reg  [7:0] leds;

    // Stub signals
    reg  pulser$clock;
    reg  pulser$enable;
    wire  pulser$pulse;

    // Sub module instances
    top$pulser pulser(
        .clock(pulser$clock),
        .enable(pulser$enable),
        .pulse(pulser$pulse)
    );

    // Update code
    always @(*) begin
        pulser$enable = 1'b1;
        pulser$clock = clock;
        leds = 32'h0;
        if (pulser$pulse) begin
            leds = 32'haa;
        end
    end

endmodule // top


module top$pulser(clock,enable,pulse);

    // Module arguments
    input wire  clock;
    input wire  enable;
    output reg  pulse;

    // Stub signals
    reg  strobe$enable;
    wire  strobe$strobe;
    reg  strobe$clock;
    reg  shot$trigger;
    wire  shot$active;
    reg  shot$clock;
    wire  shot$fired;

    // Sub module instances
    top$pulser$strobe strobe(
        .enable(strobe$enable),
        .strobe(strobe$strobe),
        .clock(strobe$clock)
    );
    top$pulser$shot shot(
        .trigger(shot$trigger),
        .active(shot$active),
        .clock(shot$clock),
        .fired(shot$fired)
    );

    // Update code
    always @(*) begin
        strobe$clock = clock;
        shot$clock = clock;
        strobe$enable = enable;
        shot$trigger = strobe$strobe;
        pulse = shot$active;
    end

endmodule // top$pulser


module top$pulser$shot(trigger,active,clock,fired);

    // Module arguments
    input wire  trigger;
    output reg  active;
    input wire  clock;
    output reg  fired;

    // Constant declarations
    localparam  duration = 32'h17d7840;

    // Stub signals
    reg  [31:0] counter$d;
    wire  [31:0] counter$q;
    reg  counter$clock;
    reg  state$d;
    wire  state$q;
    reg  state$clock;

    // Sub module instances
    top$pulser$shot$counter counter(
        .d(counter$d),
        .q(counter$q),
        .clock(counter$clock)
    );
    top$pulser$shot$state state(
        .d(state$d),
        .q(state$q),
        .clock(state$clock)
    );

    // Update code
    always @(*) begin
        counter$clock = clock;
        state$clock = clock;
        counter$d = counter$q;
        state$d = state$q;
        if (state$q) begin
            counter$d = counter$q + 32'h1;
        end
        fired = 1'b0;
        if (state$q && (counter$q == duration)) begin
            state$d = 1'b0;
            fired = 1'b1;
        end
        active = state$q;
        if (trigger) begin
            state$d = 1'b1;
            counter$d = 32'h0;
        end
    end

endmodule // top$pulser$shot


module top$pulser$shot$counter(d,q,clock);

    // Module arguments
    input wire  [31:0] d;
    output reg  [31:0] q;
    input wire  clock;

    // Update code (custom)
    initial begin
       q = 32'h0;
    end

    always @(posedge clock) begin
       q <= d;
    end

endmodule // top$pulser$shot$counter


module top$pulser$shot$state(d,q,clock);

    // Module arguments
    input wire  d;
    output reg  q;
    input wire  clock;

    // Update code (custom)
    initial begin
       q = 1'h0;
    end

    always @(posedge clock) begin
       q <= d;
    end

endmodule // top$pulser$shot$state


module top$pulser$strobe(enable,strobe,clock);

    // Module arguments
    input wire  enable;
    output reg  strobe;
    input wire  clock;

    // Constant declarations
    localparam  threshold = 32'h5f5e100;

    // Stub signals
    reg  [31:0] counter$d;
    wire  [31:0] counter$q;
    reg  counter$clock;

    // Sub module instances
    top$pulser$strobe$counter counter(
        .d(counter$d),
        .q(counter$q),
        .clock(counter$clock)
    );

    // Update code
    always @(*) begin
        counter$clock = clock;
        counter$d = counter$q;
        if (enable) begin
            counter$d = counter$q + 32'h1;
        end
        strobe = enable & (counter$q == threshold);
        if (strobe) begin
            counter$d = 32'h1;
        end
    end

endmodule // top$pulser$strobe


module top$pulser$strobe$counter(d,q,clock);

    // Module arguments
    input wire  [31:0] d;
    output reg  [31:0] q;
    input wire  clock;

    // Update code (custom)
    initial begin
       q = 32'h0;
    end

    always @(posedge clock) begin
       q <= d;
    end

endmodule // top$pulser$strobe$counter